The new and improved GeoServer Style Editor
Over the course of the past few months, I have been working on improving GeoServer style editor page based on the “CSS Styles” page. These changes are now available in the newly released GeoServer 2.10.0.
The original GeoServer Improvement Proposal for these changes (GSIP-149) can be found on the github page for the GeoServer project.
From a development perspective, working on these improvements was quite the experience, and turned out to not be as simple a port as I had expected. By the end of it, I wound up learning a lot about wicket (The UI Framework used by GeoServer), and the various ways in which we have gotten it to do things it was never designed to do.
Thanks to Andrea Aime for help with some of the technical aspects of Wicket and the previous Style Page, and to Jody Garnett for guiding me through the creation of my first GSIP. This work greatly benefited from review and feedback during the 2.10 release candidate and from the those attending the FOSS4G Styling workshop.
Intro to the New Style Editor
The new style editor is far more functional, in addition to managing the style you can now directly update which layers use the style, interactively preview your map at different zoom levels, and review layer attributes.
The new “apply” button works very well with the map preview, allowing you to save your work and review the change visually without leaving the style editor.
Refer to the User Guide for more details about each tab.
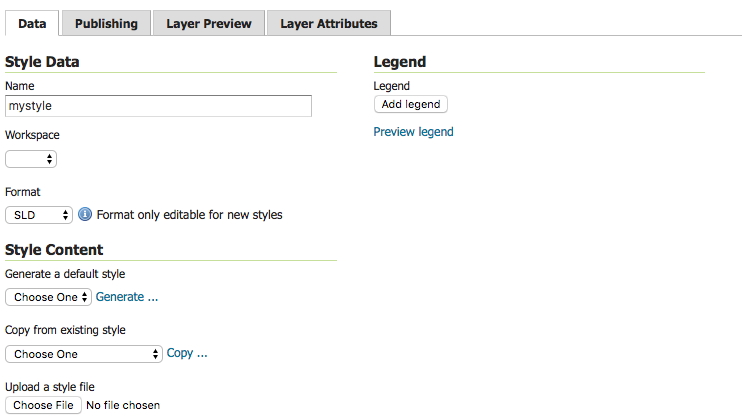
Data Tab
All the functionality of the old style editor is available on the first tab. This consists of modifying style data (name, workspace, format), style content (style generation and upload functions), and the legend graphic.
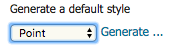
For example to generate a new point style:
-
Under Generate a default style select Point.
-
Click Generate, a random color will be used when generating the new style.
-
The Style editor is filled in with the generated style.
-
Press Apply to save this style while remaining on the style editor page.
-
Click Preview Legend to view a preview of the style iconography.

Publishing Tab
The “Publishing” tab visualizes which layers the current style is associated with, and lets you modify these associations for all layers.
For instance, we can set our new style to be the default style for the “buildings” layer:

To use our new point style we can configure several layers:
-
Make our style the default for buildings, click the checkbox under the Default column.

-
To allow our style to be used as an alternative style for firestations and hospitals click the checkbox under the Associated column.

-
These changes are made immediately.
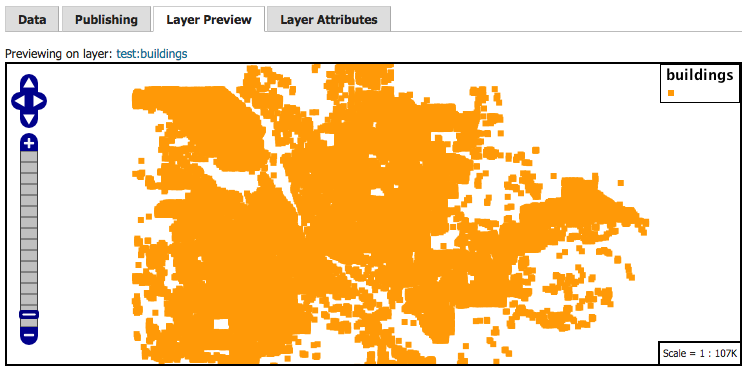
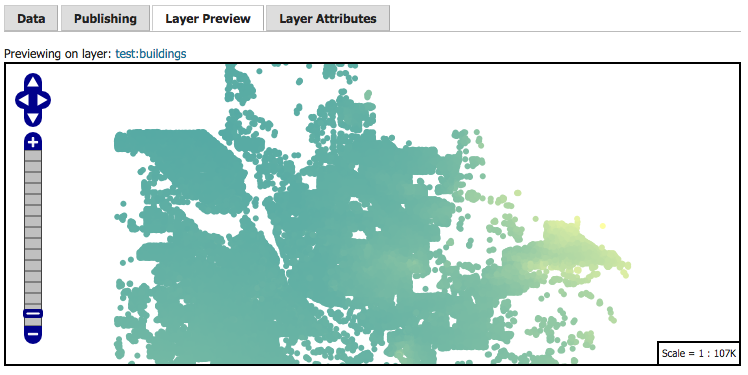
Layer Preview Tab
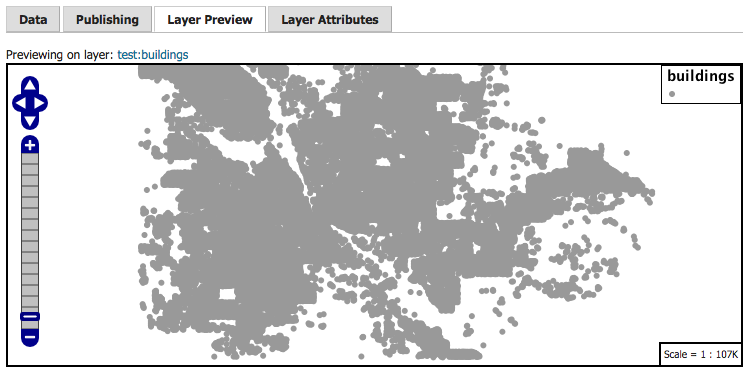
One of the most valuable elements of the earlier CSS Style page was the ability to preview the current style on an existing layer. This ability to edit current layer, while showing a layer preview, is the key workflow improvement of the improved Style Editor.
The preview tab allows you to view the current style on any layer while editing:
-
The layer used for the preview can be changed by clicking the layer name at the top of the page.
-
The style editor remains at the bottom of the page when switching tabs, so we can go ahead and modify our style:
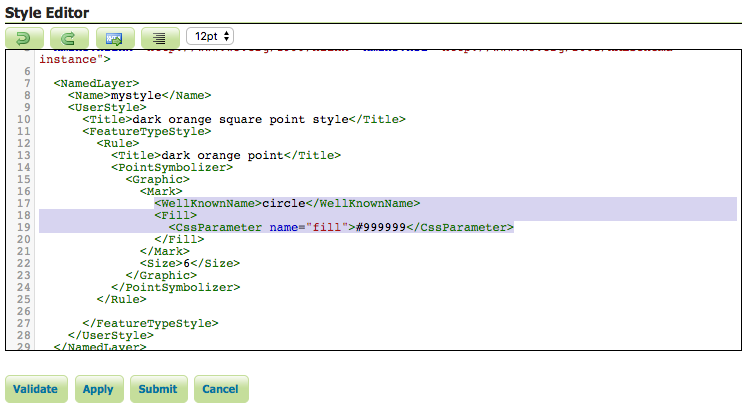
-
After modifying the style, we can click the new “Apply” button to save the style and remain on the page. The Layer Preview will be updated with the new styling:
Layer Attributes Tab
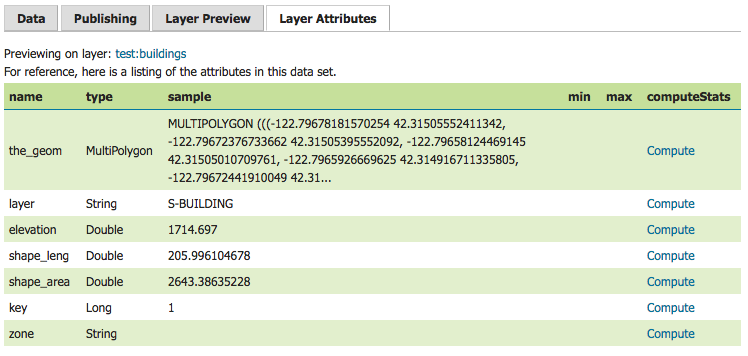
Similar to the Layer Preview, the Layer Attributes tab allows you to preview the attributes associated with the preview layer.
This can be useful for determining what attribute to use for labeling, or how best to configure scale-dependant rules.
-
The layer used for the preview can be changed by clicking the layer name at the top of the page.
-
The Min/Max statistics can be calculated using the “Compute” link. Let’s take a look at the range of elevations:

-
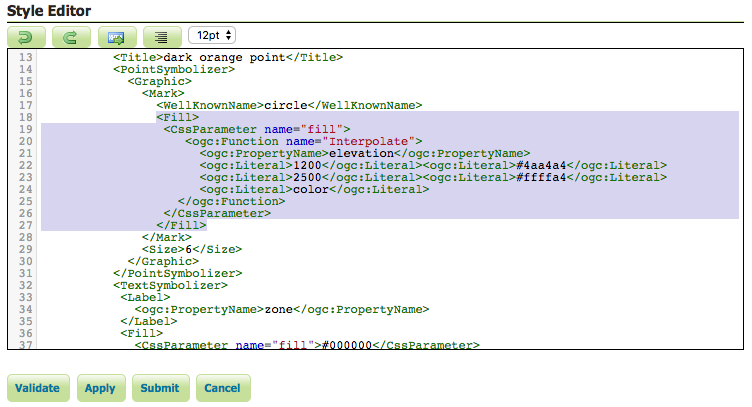
We can use this information to set the colour of the points based on their elevation, using the Interpolate function:
-
Clicking the “Apply” button and returning to the preview tab, we can see the results of these changes in the in the layer preview:
And there you have it! The new style page presents a much more streamlined workflow for writing new styles for your layers.
If you are using the new style editor and encounter an error, please file a bug report.